Introduction to Cherry Pie Bars
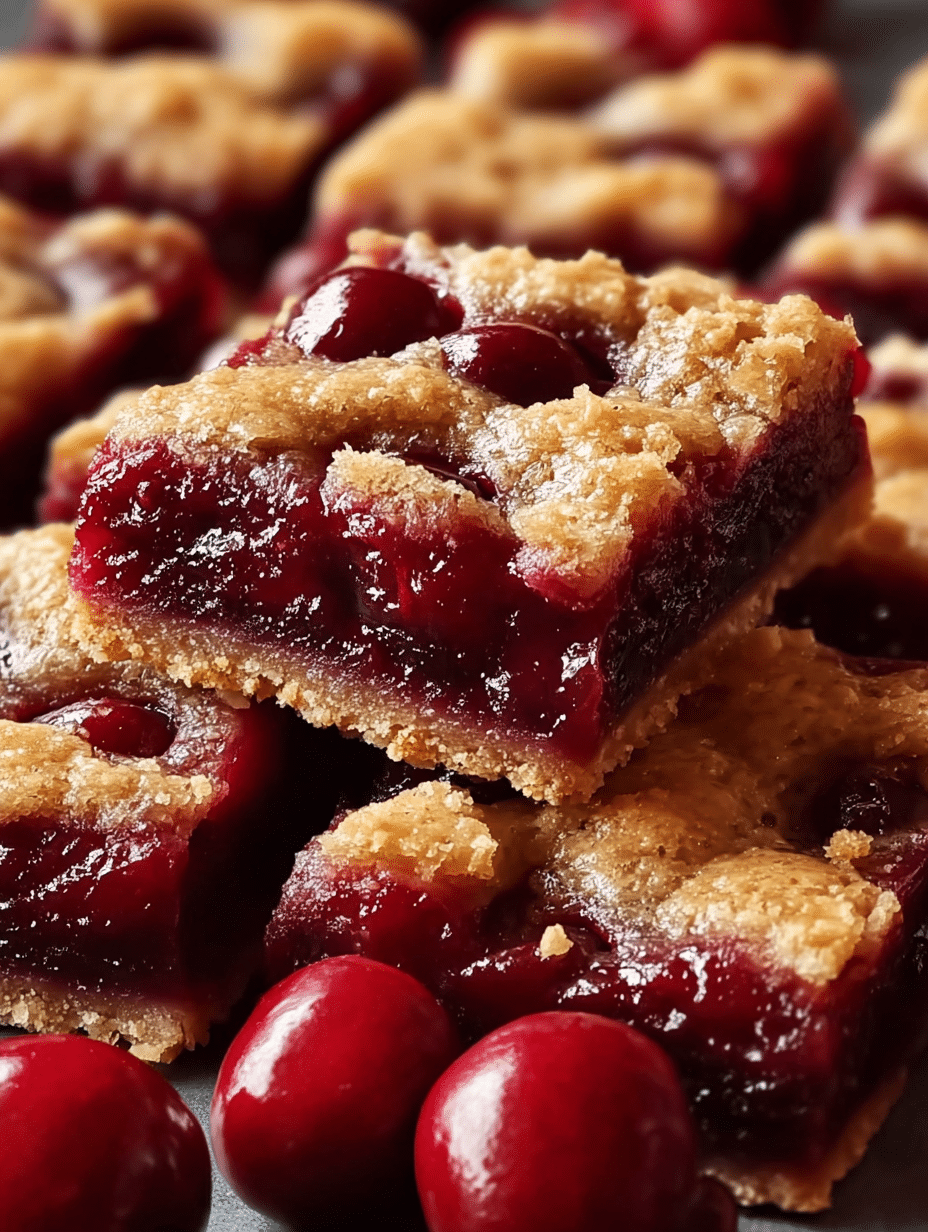
There’s something magical about the aroma of freshly baked Cherry Pie Bars wafting through the kitchen. It instantly transports me back to my childhood, where every family gathering was filled with laughter and sweet treats. These bars are not just a dessert; they’re a quick solution for a busy day or a delightful way to impress your loved ones. With a buttery crust and a luscious cherry filling, they’re perfect for any occasion. Trust me, once you try this easy recipe, you’ll find yourself making them again and again!
Why You’ll Love This Cherry Pie Bars
These Cherry Pie Bars are a dream come true for dessert lovers like me! They’re incredibly easy to whip up, making them perfect for busy weeknights or last-minute gatherings. The sweet, tangy cherry filling paired with a buttery crust creates a flavor explosion that will have everyone asking for seconds. Plus, they’re a delightful treat that can be enjoyed warm or cold, making them versatile for any occasion!
Ingredients for Cherry Pie Bars
Gathering the right ingredients is the first step to creating these delightful Cherry Pie Bars. Here’s what you’ll need:
- Unsalted Butter: This is the foundation of our buttery crust. Softened butter ensures a smooth batter.
- Granulated Sugar: Sweetness is key! It balances the tartness of the cherries beautifully.
- Large Eggs: Eggs add moisture and help bind everything together, giving the bars a lovely texture.
- Vanilla Extract: A splash of vanilla enhances the flavor, making each bite even more irresistible.
- All-Purpose Flour: This is the backbone of the crust and the bars, providing structure.
- Salt: Just a pinch! It enhances the sweetness and balances the flavors.
- Cherry Pie Filling: You can use a can for convenience or make your own with fresh or frozen cherries, sugar, cornstarch, and lemon juice for a homemade touch.
For those looking to experiment, consider adding a sprinkle of almond extract for a nutty twist or using whole wheat flour for a healthier option. The exact quantities for each ingredient are available at the bottom of the article for easy printing!
How to Make Cherry Pie Bars
Now that we have our ingredients ready, let’s dive into the fun part—making these delicious Cherry Pie Bars! Follow these simple steps, and you’ll have a delightful dessert that will impress everyone.
Step 1: Preheat the Oven
First things first, preheat your oven to 350°F (175°C). This ensures that your Cherry Pie Bars bake evenly. While the oven warms up, prepare your 9×13 inch baking pan by greasing it or lining it with parchment paper. This little step makes cleanup a breeze!
Step 2: Cream Butter and Sugar
In a large mixing bowl, combine the softened butter and granulated sugar. Using an electric mixer, beat them together until the mixture is light and fluffy. This step is crucial as it creates a lovely texture for your bars. Trust me, the fluffier, the better!
Step 3: Add Eggs and Vanilla
Next, add the eggs one at a time, mixing well after each addition. This helps incorporate air into the batter, making it rise beautifully. Then, pour in the vanilla extract. The aroma will make your kitchen smell heavenly!
Step 4: Combine Dry Ingredients
Now, it’s time to mix in the dry ingredients. Gradually add the all-purpose flour and salt to the wet mixture. Stir until just combined. Be careful not to overmix; we want a smooth batter, not a tough one!
Step 5: Prepare the Base Layer
Take about two-thirds of the batter and spread it evenly in the prepared baking pan. This will form the delicious crust for your Cherry Pie Bars. Make sure it’s nice and even, so every bite is just as tasty!
Step 6: Add Cherry Filling
Now comes the fun part! Spoon the cherry pie filling over the crust layer. Spread it out evenly, ensuring every corner gets that sweet, tangy goodness. This is where the magic happens!
Step 7: Top with Remaining Batter
With the cherry filling in place, drop spoonfuls of the remaining batter over the top. Don’t worry about covering it completely; a cobbled look adds character and charm to your Cherry Pie Bars!
Step 8: Bake to Perfection
Pop the pan into the preheated oven and bake for 35–40 minutes. You’ll know they’re done when the top is golden and set. The aroma will fill your kitchen, making it hard to resist sneaking a taste!
Step 9: Cool and Slice
Once baked, remove the pan from the oven and let it cool completely. This is key for clean edges when slicing. Patience is a virtue, especially when it comes to these Cherry Pie Bars!
Tips for Success
- Make sure your butter is softened for easy creaming with sugar.
- Use room temperature eggs for better incorporation into the batter.
- Don’t overmix the batter; it should be smooth but not tough.
- Let the bars cool completely before slicing for neat edges.
- Experiment with different fruit fillings for a fun twist!
Equipment Needed
- 9×13 inch Baking Pan: A standard size for these bars; you can use a glass or metal pan.
- Mixing Bowls: A couple of medium-sized bowls will do the trick.
- Electric Mixer: For creaming butter and sugar; a whisk works too, but it’ll take longer.
- Spatula: Perfect for spreading the batter and filling evenly.
- Parchment Paper: Optional, but it makes for easy cleanup!
Variations of Cherry Pie Bars
- Almond Cherry Bars: Add a teaspoon of almond extract to the batter for a delightful nutty flavor that pairs beautifully with cherries.
- Chocolate Cherry Bars: Fold in some chocolate chips into the batter for a rich, decadent twist on the classic recipe.
- Gluten-Free Option: Substitute all-purpose flour with a gluten-free flour blend to make these bars suitable for gluten-sensitive friends.
- Vegan Cherry Bars: Replace eggs with flaxseed meal mixed with water and use vegan butter for a plant-based version.
- Mixed Berry Bars: Swap out the cherry filling for a mix of blueberries and raspberries for a colorful and fruity variation.
Serving Suggestions for Cherry Pie Bars
- Serve warm with a scoop of vanilla ice cream for a delightful contrast.
- Pair with a dollop of whipped cream for an extra touch of sweetness.
- Drizzle with chocolate sauce for a decadent twist.
- Garnish with fresh mint leaves for a pop of color.
- Enjoy with a cup of coffee or tea for a cozy afternoon treat.
FAQs about Cherry Pie Bars
As I’ve shared my love for these Cherry Pie Bars, I often get questions from fellow dessert enthusiasts. Here are some of the most common queries I’ve encountered, along with my answers to help you on your baking journey!
Can I use fresh cherries instead of canned filling?
Absolutely! Fresh cherries can be used to make a homemade filling. Just simmer them with sugar, cornstarch, and lemon juice until thickened. It adds a delightful freshness to your Cherry Pie Bars!
How do I store leftover Cherry Pie Bars?
Store any leftovers in an airtight container at room temperature for up to three days. If you want to keep them longer, refrigerate them for up to a week. Just remember to let them come to room temperature before serving!
Can I freeze Cherry Pie Bars?
Yes, you can freeze these bars! Once they’re completely cool, wrap them tightly in plastic wrap and then in aluminum foil. They’ll stay fresh for up to three months. Just thaw them in the fridge before enjoying!
What can I substitute for eggs in this recipe?
If you’re looking for an egg substitute, try using flaxseed meal mixed with water. One tablespoon of flaxseed meal combined with three tablespoons of water works well for each egg. It’s a great option for vegan Cherry Pie Bars!
Can I make these Cherry Pie Bars gluten-free?
Definitely! Just swap out the all-purpose flour for a gluten-free flour blend. This way, everyone can enjoy these delicious Cherry Pie Bars, regardless of dietary restrictions!
Final Thoughts
Making Cherry Pie Bars is more than just baking; it’s about creating memories and sharing joy with those you love. The buttery crust and sweet cherry filling come together to form a delightful treat that warms the heart. Whether you’re enjoying them at a family gathering or savoring a quiet moment with a cup of coffee, these bars bring a smile to your face. I hope you find as much happiness in baking and sharing these Cherry Pie Bars as I do. So, roll up your sleeves and let the sweet aroma fill your kitchen—happiness is just a bite away!
Print
Cherry Pie Bars: Discover the Easy Recipe Today!
- Total Time: 1 hour
- Yield: 16 bars 1x
- Diet: Vegetarian
Description
Delicious Cherry Pie Bars with a buttery crust and sweet cherry filling, perfect for dessert lovers.
Ingredients
- 1 cup (225 g) unsalted butter, softened
- 1 ½ cups (300 g) granulated sugar
- 4 large eggs
- 1 tsp vanilla extract
- 3 cups (375 g) all-purpose flour
- 1 tsp salt
- 1 can (21 oz / 600 g) cherry pie filling (or homemade: 3 cups fresh/frozen cherries, ½ cup sugar, 1 tbsp cornstarch, 1 tbsp lemon juice)
Instructions
- Preheat oven to 175°C (350°F). Grease or line a 9×13 inch (23×33 cm) baking pan.
- In a bowl, cream butter and sugar until fluffy.
- Add eggs one at a time, then vanilla.
- Mix in flour and salt until combined.
- Spread ⅔ of the batter evenly in prepared pan.
- Spread cherry pie filling evenly over crust layer.
- Drop spoonfuls of the remaining batter over the filling (it won’t cover completely, giving a cobbled look).
- Bake for 35–40 minutes, until golden and set.
- Cool completely before slicing into bars.
Notes
- For a homemade cherry filling, simmer fresh or frozen cherries with sugar, cornstarch, and lemon juice until thick.
- Ensure the bars are completely cool before slicing for clean edges.
- Prep Time: 20 minutes
- Cook Time: 40 minutes
- Category: Dessert
- Method: Baking
- Cuisine: American
Nutrition
- Serving Size: 1 bar
- Calories: 250
- Sugar: 18g
- Sodium: 150mg
- Fat: 12g
- Saturated Fat: 7g
- Unsaturated Fat: 3g
- Trans Fat: 0g
- Carbohydrates: 35g
- Fiber: 1g
- Protein: 3g
- Cholesterol: 70mg


